- Serene AI
- Posts
- Stress-Free Social Media with AI - Part 2
Stress-Free Social Media with AI - Part 2
Review and schedule your AI-generated posts
Hazel-Ann Butcher
July 09, 2024

Social media content creation can be stress-free!
Disclosure: This newsletter contains affiliate links. If you click through and make a purchase, I may earn a commission at no additional cost to you. I only recommend products or services I believe will add value to my readers.
Social media is a must for any business these days. It's how you connect with your audience, build your brand, and drive traffic to your website.
However, managing social media can be time-consuming. The average marketer spends about 6 hours per week on social media, according to a survey by Social Media Examiner. That's a lot of time that could be spent on other important tasks.
Last week's newsletter showed you how to automate creating your social media posts using AI, which can help reduce this time burden.
Now, we're taking it a step further.
In part 2, you're going to learn how to automatically schedule your posts after you've manually reviewed them, streamlining your social media workflow even more.
Here’s what we did so far:
1. We used NewsAPI to get trending news about our business topic, and added them to a Google Sheet.
2. We fed those ideas into ChatGPT to create the actual posts.
3. We added the generated posts back into the Google Sheet.
Here’s what we’re going to do now:
4. Approval: We’ll manually review and approve the generated posts.
5. Scheduling: We’ll send the approved posts to Buffer to schedule them for posting.
6. Tracking: We’ll update the Google Sheet to mark which posts have been scheduled.
Sounds great, right? The best part is the only thing we have to do manually is approve the posts. Everything else is done automatically.
Let's dive into how to set this up.
Tools You'll Need
- Buffer
- Make
Step 1: Approve Post in Google Sheet
We set up our Google Sheet last week and the AI-generated posts were added to it. Now you have to manually go through those posts and make any edits you think are necessary.
It’s important that you always review the generated content before posting to ensure it aligns with your brand voice and values.
This is the only manual step in this workflow, and it’s the most important one.
When you’re happy with your edits, click the checkbox in the Approved column. That’s all you need to do!
Step 2: Search Google Sheets Rows
In Make, create a new scenario.

Add a Google Sheets module.
Choose Search Rows as the action.
Set up your Google Drive connection.
Select the Google Sheet we’ve been working with, and the appropriate worksheet.
Add a Filter, and set up the details as you see it in the picture below.
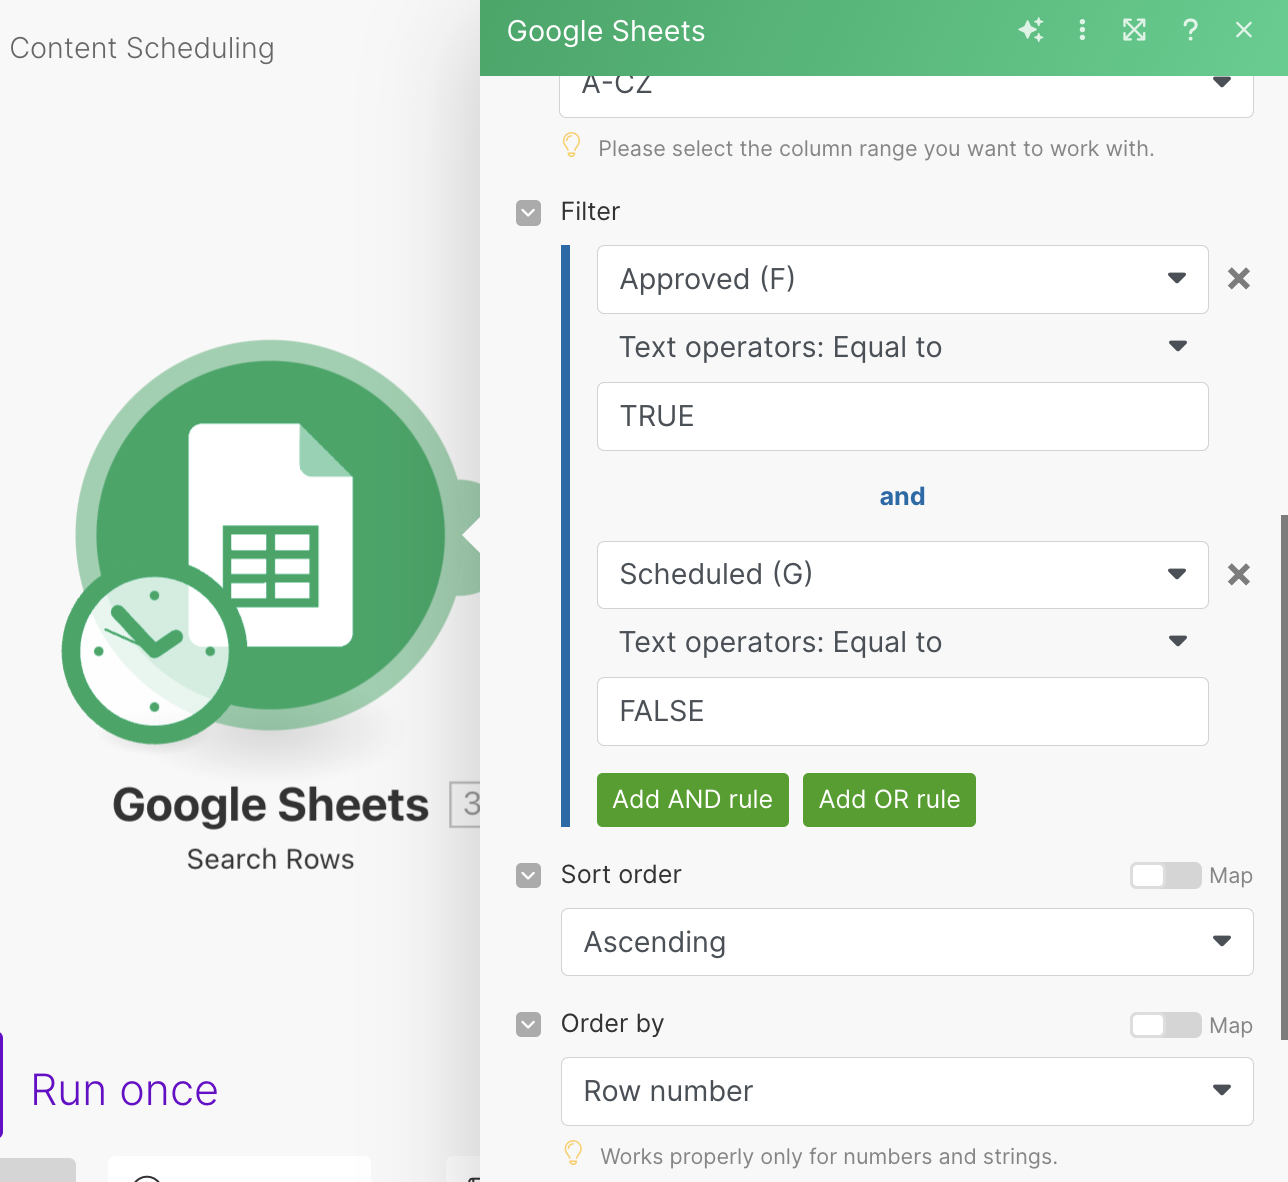
Set Maximum number of returned rows to 1.
Click OK.
Save the scenario.
Run the module to ensure it works.
Step 3: Schedule the Post
Sign up for Buffer if you don’t already have an account.
In Make, add a Buffer module to the scenario.
Choose Create a status update as the action.
Add your Buffer connection.
Choose the Profile you want to post to.
Click in the Text field. Map the X Post data from the previous module, as in the picture.
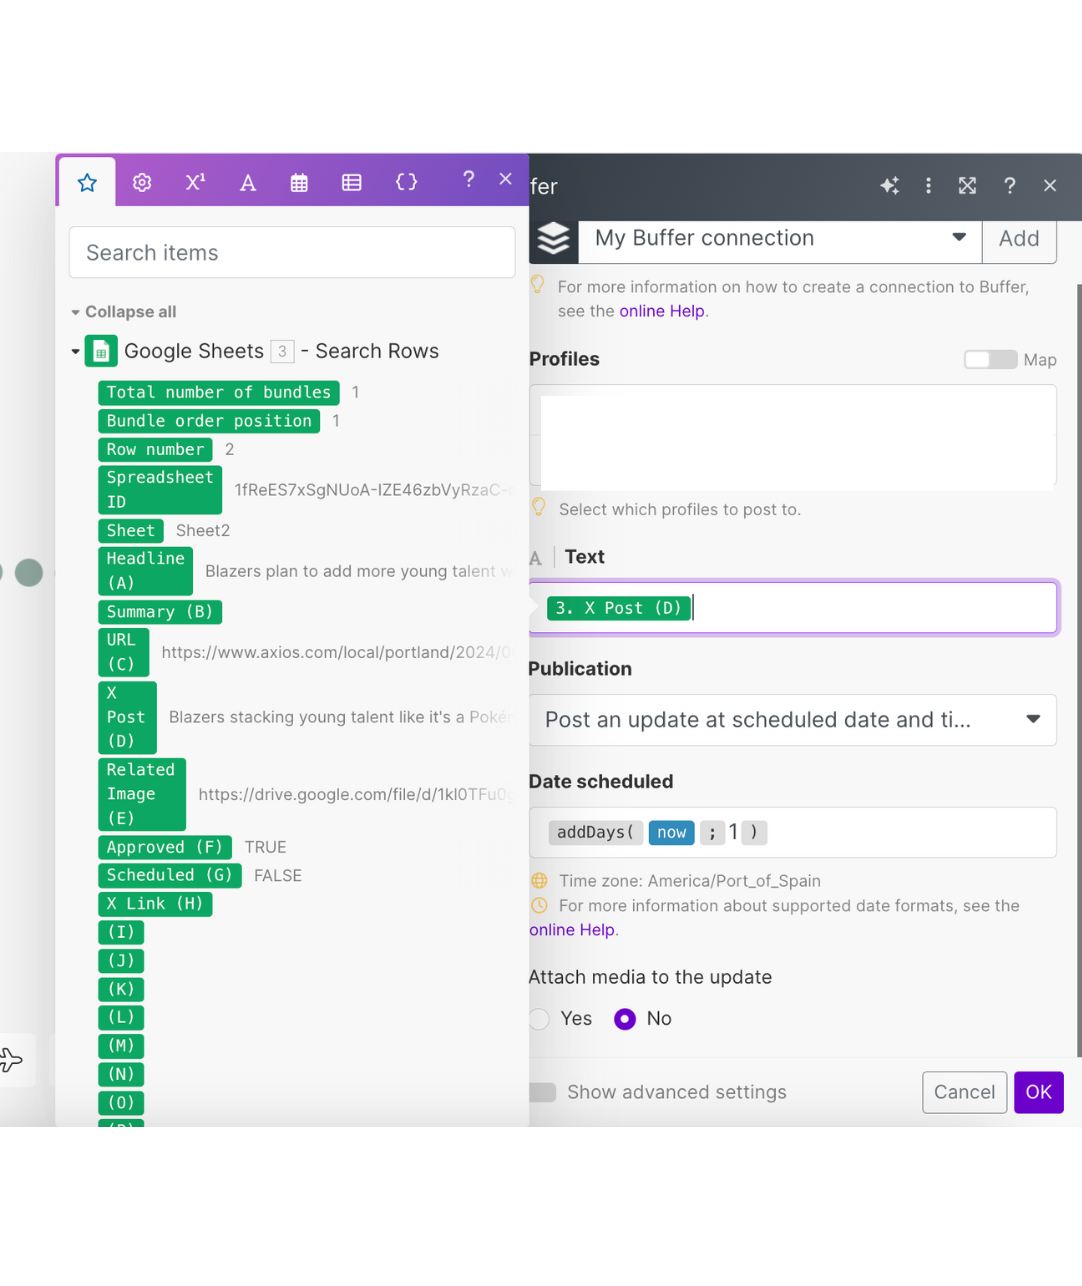
For Publication, select Post an update at scheduled date and time.
For Date scheduled, add the following formula: addDays(now; 1) to schedule the post for the following day. You can change the number of days you want to schedule ahead - for example, to schedule the post 7 days in advance, the formula becomes addDays(now; 7).
Click OK.
Save the scenario.
Run the scenario to ensure it all works. (Check your Buffer account to verify the post was scheduled.)
Step 4: Mark Post as Scheduled
The last step is to update the Google Sheet that the post was scheduled.
Add a Google Sheets module to the scenario.
Choose Update a Row as the action.
Select the spreadsheet name and worksheet.
For Row number, click in the field and select Row number from the first Google Sheet module.
Type TRUE in the Approved field to mark the post scheduled.
Optional: You can also record the post Status ID from the Buffer module, as in the picture below.
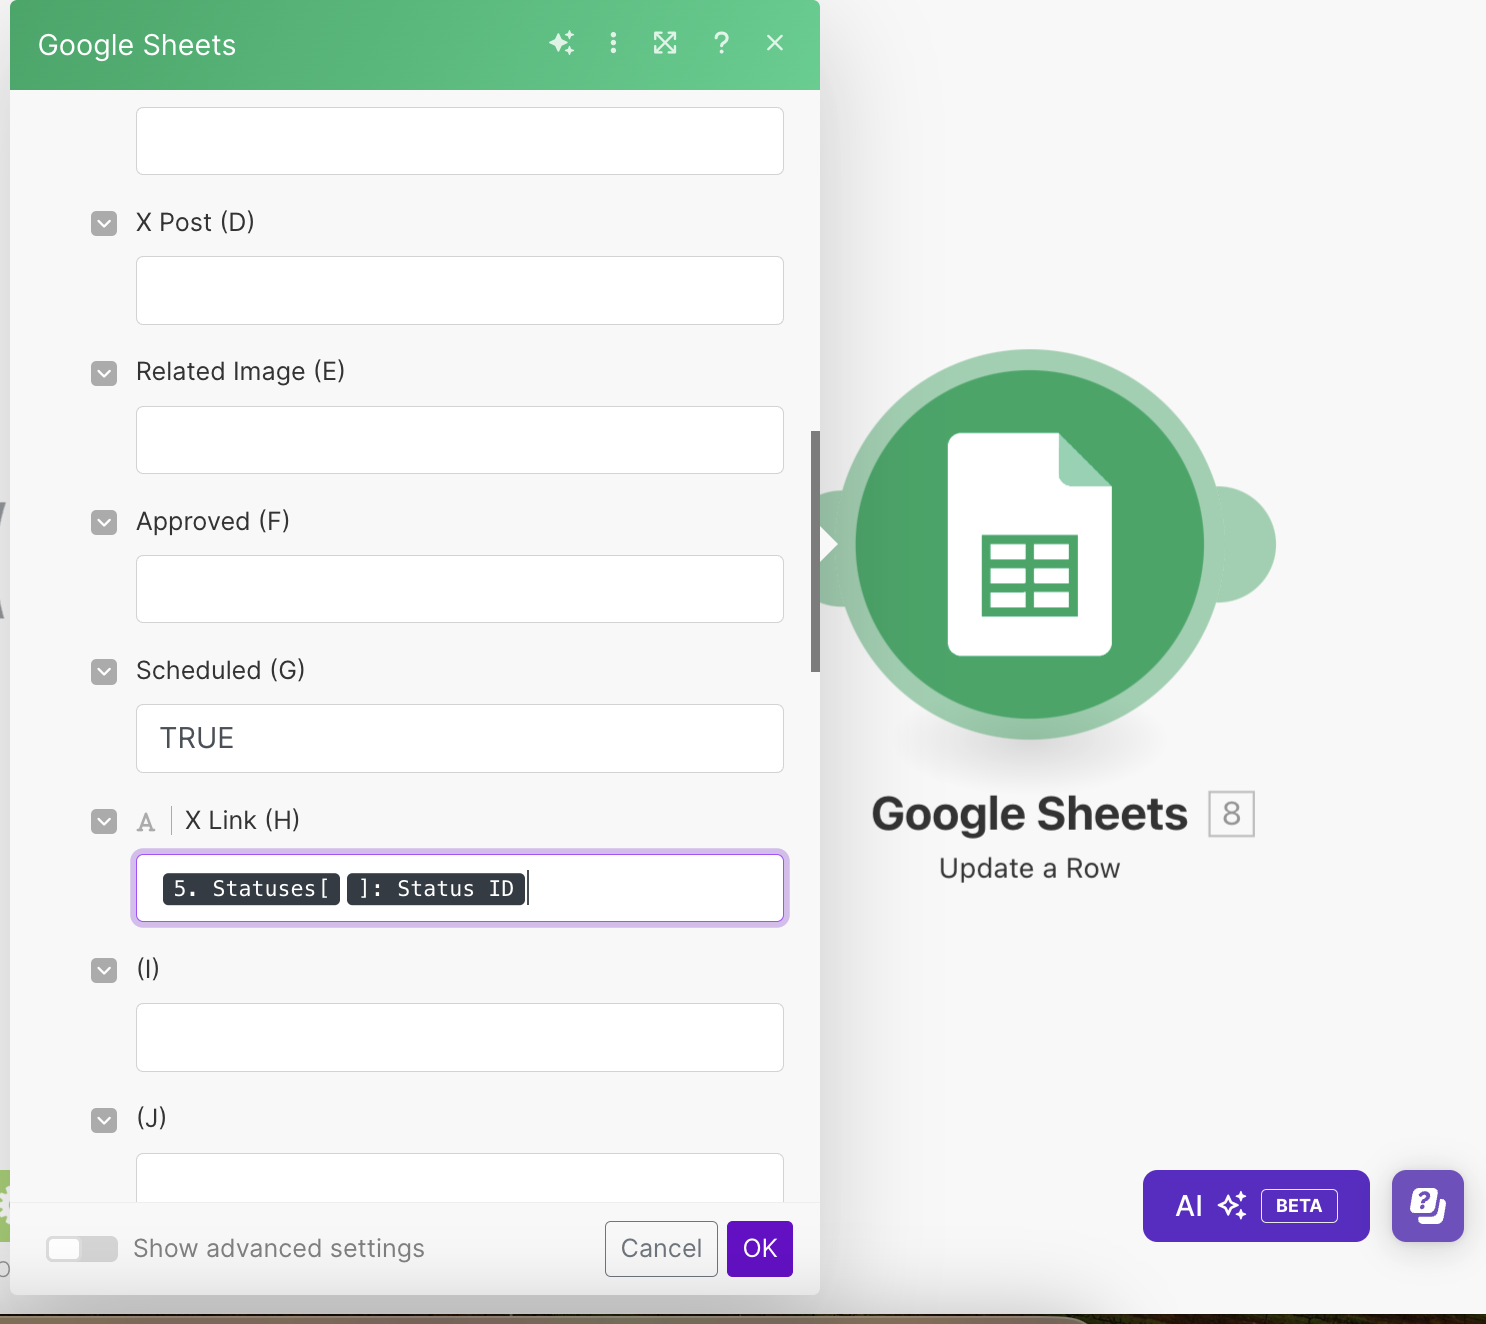
Click OK.
Save the scenario.
Run once.
This is what the entire scenario will look like:
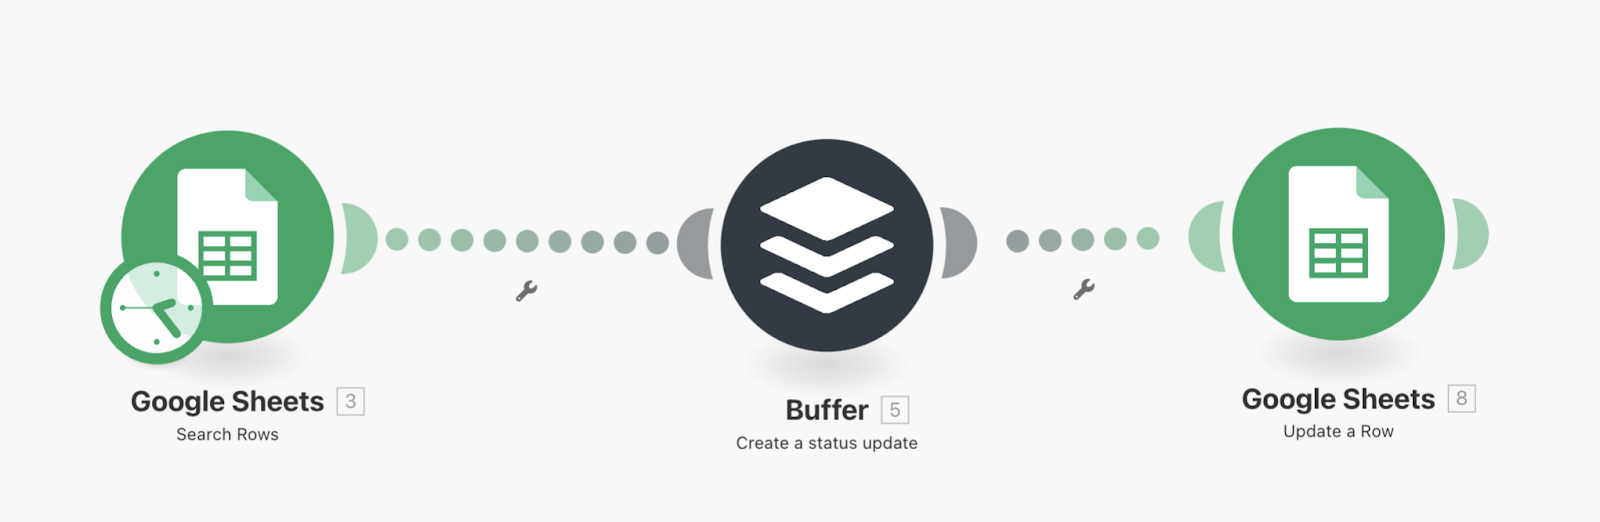
You can schedule this scenario to run every day, or once a week, whichever you prefer.
Upgrading the System
This system is just the beginning. Here are a few ways you could expand on it:
Create content for multiple social media platforms.
Create AI-generated images to go along with your posts.
Track engagement on your posts and feed this data back into your AI to improve future content.
Want me to set up a custom version of this system for your business? Book a free discovery call with me.
---
💡 Automation Inspiration
Looking for more ways to automate your business with AI? Here are a few ideas:
- Customer service chatbots
- Personalized product recommendations
- Inventory forecasting
- Lead scoring and nurturing
The possibilities are endless. If there's a specific task you'd like to automate, hit reply and let me know. I'd be happy to brainstorm some solutions with you.
---
Up Next...
In next week's newsletter, we’re going to create a podcast summary tool. Think of how much time that automation would free up for you. You'll save hours and still keep up with your favorite podcasts.
Want to discuss how AI can help your business be more productive and profitable? Book a free discovery call with me.
---
P.S. If you found this helpful, forward it to a friend or colleague who could benefit from automating their social media. And if you're not already subscribed, you can do so here to get more AI automation tips and tutorials delivered straight to your inbox.